Homemade Tomato Ketchup

As I realized this summer by my 5 and a half foot tomato cherry plant - apparently I have a  knack for tomato gardening. Which is awesome right?

Well, that's the thing, when your plants are doing so well and have entered into a love affair with the neighbourhood bees and monarchs the resulting tomato offspring are numerous.
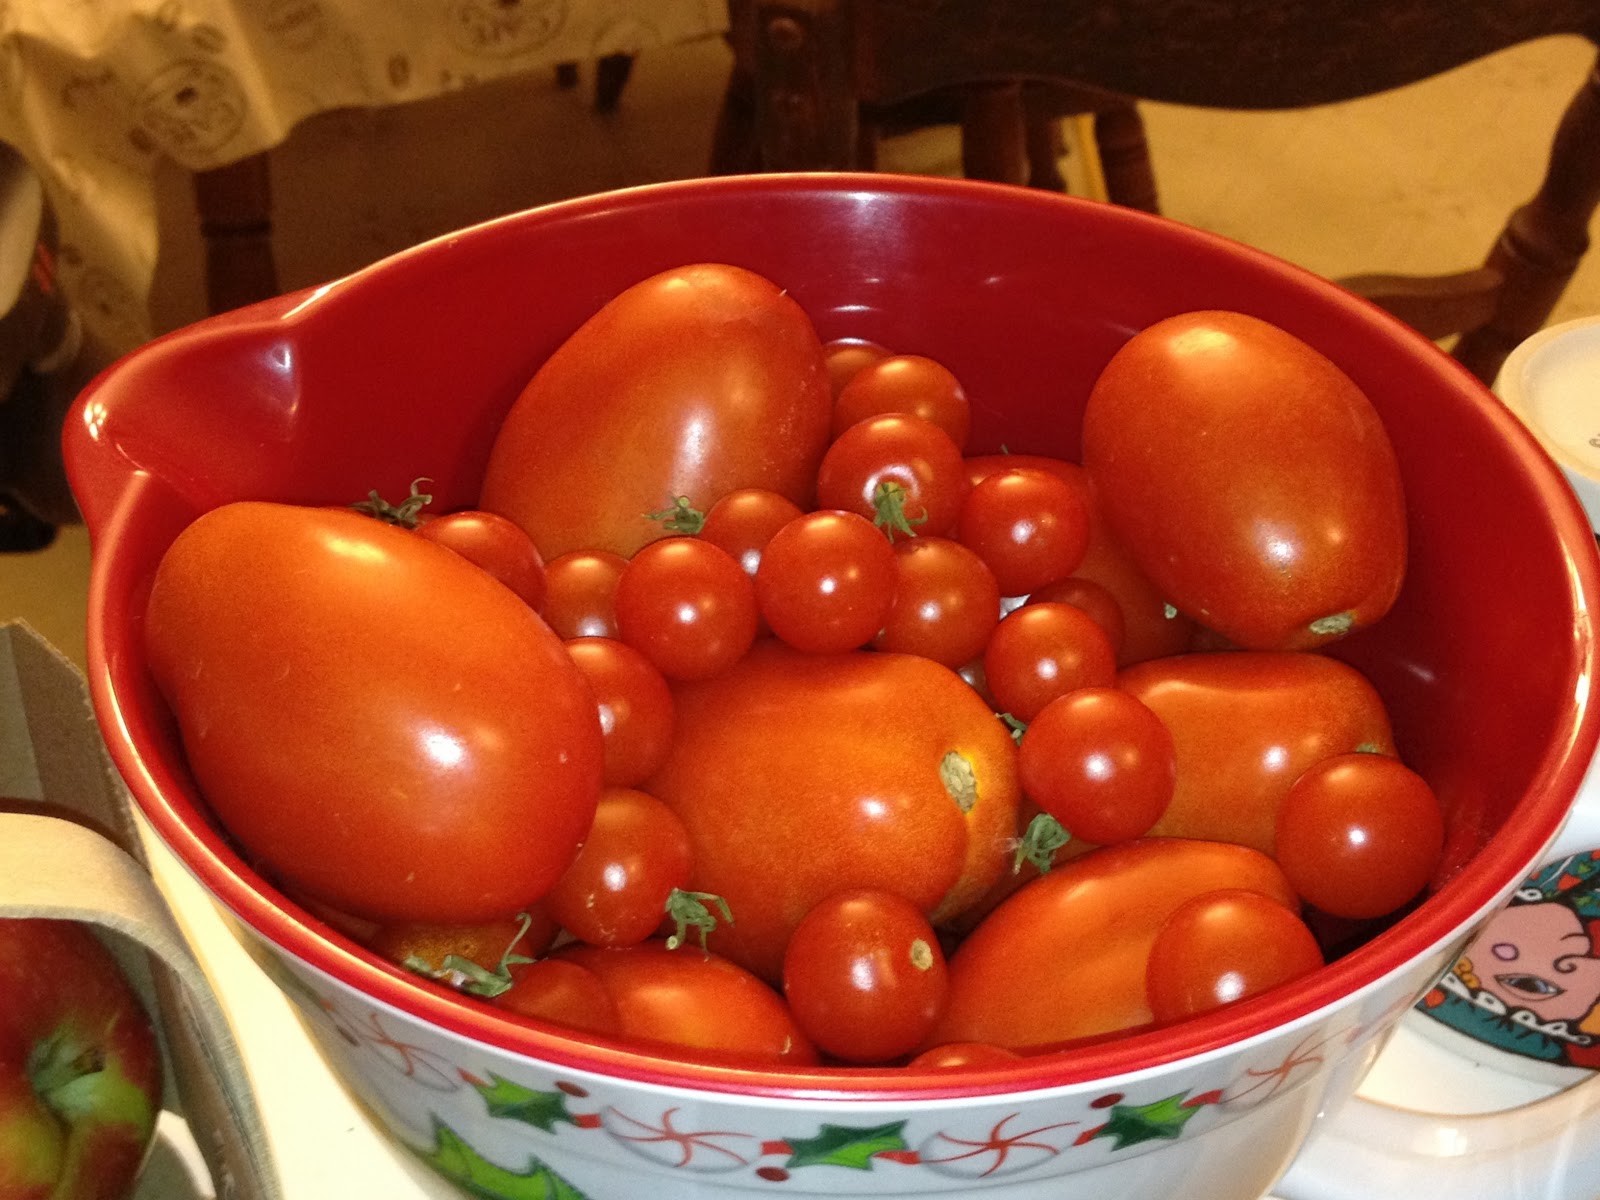


Which leaves the dilemma of how to go about using all the tomatoes before they go bad. I mean, lets face it- there is only so much spaghetti sauce one can make (especially on limited time). One obvious use for tomatoes is ketchup. J and E absolutely love ketchup, however the high fructose corn syrup and high salt content in the commercialized brands can cause many health problems down the road. Some include: high blood pressure, stroke, stomach cancer yadda yadda. Many of us have heard of the risks associated with consuming products containing high fructose corn syrup.


But does this mean that if we allow our kids to eat ketchup they will all grow up to be overweight, cancer ridden, ADHD monsters with high blood pressure? No, not necessarily. The key is really just moderation.

Although ketchup is high on the list of things containing both too much salt and high fructose corn syrup (ingredients that are lurking in many other products), there are some good things about it. For example Lycopene. Lycopene is the pigment that gives tomatoes their colour - and is a crazy powerful anti-oxident whose secret concentrated superfood power can only be unleashed through the processing of the tomato.

So the question becomes - how can we harness the anti-oxident power of the tomato while ridding our ketchup of all the excess crap?

Otherwise known as the whole reason behind this post.

Well, answer is simple - HOMEMADE KETCHUP! Yes, that's right. I decided to make my own. The recipe is actually very simple.

10 Tomatoes (I used Roma Tomatoes but you can use other kinds)
                             2 Yellow Onions     
                             3 gloves minced garlic
                      1 small can tomato paste (or homemade from  a ridiculous abundance of garden tomatoes....)
                             1/4 cup molasses
                             1/4 cup balsamic vinegar
                             1/2 tsp fennel seeds
                             2-3 tsp nutmeg
                             1/2 tsp allspice
                             1 Tbsp agave (you can find this in the organic section at most grocery stores)

***If you want to make a spicy version of this you can add a pinch of cayenne pepper


1. Process tomatoes and onions in food processor. 
2. Add all other ingredients and blends together until desired consistency.


3. Put everything in a pot on the stove. Simmer on medium-low until mixture reduces by 1/4.


4. Cool and jar contents. 


And Voila! Homemade ketchup - easy peezie lemon squeezie! Erm. Tomato squeezie? This recipe will thicken a bit more once its refrigerated but it remains a nice consistency. It has the triple stamped seal of approval from my three food critics - and I don't mind J and E slathering their food with it. So it's win win!





Recipe: The Healthiest Birthday Cake on the Block

What do you feed your one year-old for his birthday?


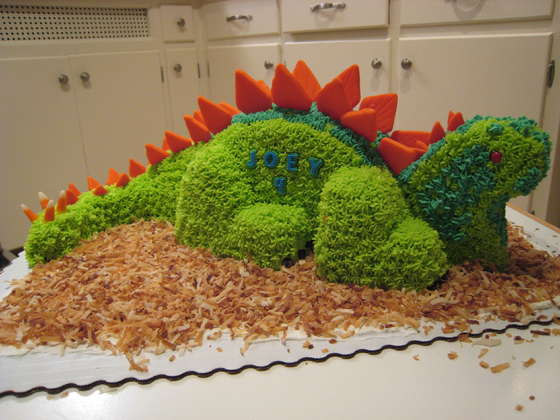
There are some pretty amazing cakes out there. Like the cake my co-blogger Sarah located for her son's birthday : dino-themed, marzipan-covered, cute-as-a-button... But that was for a whole birthday party, complete with paper plates, streamers, a hundred delicious dishes, small healthy treats in the shape of penguins, friends, in-laws, and other kids.

OK so this isn't actually the cake Sarah made.
She didn't get her one year-old P confused with a nine year-old named Joey.
You wanna make a cake like this? You're that kind of mama? Well I'm not about to stop you.
First, leave this blog.
Second, go to: http://www.instructables.com/id/3d-Dinosaur-Birthday-Cake/
Third, don't come back.


For Sweet Baby James' birthday, it was just us.
I'm not about to buy a dino cake for just us. Because that would be expensive.

Also, I forgot to order it ahead of time.

Enter, the New York Times recipe blog. I guess intellectuals need to eat after all.

The Molasses Cake is one of those fake foods. You know what I'm talking about – everyone tells you it tastes 'just like' the real one but actually it's healthy and doesn't contain anything worth trading into your friend's lunch-box. Like plain yogourt isn't whipped cream and bran flakes aren't exactly sugar cereal. In fact, there's a whole rainbow of deception in this adult-to-kids lie...

  • Zucchini bread = Chocolate cake. 
  • Frozen yogourt = Ice cream
  • Carrob anything = Chocolate anything
  • Frozen juice (you know that kind with the little red plastic tops that you put in the freezer yourself) = Popsicles
  • Kale chips = Potato chips
  • Small pieces of red onion = Special bacon bits
  • Tofu dogs = Hot dogs
  • McDonald's = A home renovation supply store
(many thanks to fb friends for sharing their memories – I know it was painful)

With regard to this last one, a friend of a friend of mine actually pulled it off. Whenever his kids asked about the yellow arches, he told them it was "Just, like, another Home Depot." Worked fine until the day his six year-old went off to a friend's birthday party. She came home and he asked her how it was.

"We went to McDonald's," she said. "And it was delicious."

She didn't speak to her dad for a week.

I think we should all take a lesson from this: while there are many things wrong with feeding your baby ice-cream cake from DQ, there's also something downright sneaky about serving crunchysproutkalehealthbread and calling it "cake".


"Don't eat it, it's iron-rich bread!"


So I added a blood orange and ginger compote filling.

And mascarpone-chai icing.


And it was delicious.

_____________________________________________

Molasses Bread: 


Ingredients: 
  • Dry:
    • 2 cups whole wheat flour
    • 1 teaspoon baking powder
    • 1 teaspoon ground ginger
    • 1/2 teaspoon baking soda
    • a dash of salt
    • 1/3 cup brown sugar
    • 1/2 cup raisins (optional)
  • Wet:
    • 2 eggs
    • 1 cup plain yogourt
    • 1/2 cup blackstrap molasses
    • 1/4 cup canola oil
Directions:
  • Prep:
    • Preheat oven to 350°F, with a rack in the middle.
    • Grease a large casserole dish on the bottoms and sides.
  • Mix the dry ingredients together in one bowl.
  • Mix the wet ingredients together in another.
  • Put the two together.
  • Pour mixture into the pan and bake until the fork-test comes out clean.


Blood Orange and Ginger Compote Filling


Ingredients:
  • One blood orange
  • Assorted citrus you'd like to get rid of
  • Sugar (optional)
  • Dried ginger root
Directions:
  • Wash the blood orange. Without peeling it, grate half its skin (zest). Use a cheese grater, it's easy.
  • Peel the orange and blend its flesh with whatever other citrus you have on hand (withered grapefruit, anyone?) until it's smoothie consistency.
  • Transfer to a small pot on the stove at medium. Bring to a low boil, stirring consistently.
  • Add the zest, ginger and sugar. 
  • Turn the temperature down and let it simmer until the water's boiled off and it looks like the kind of thing you'd like to find in the middle of a cake.


Chai-Mascarpone Icing (this shit is incredible)


Ingredients: 
  • 1 cup mascarpone
  • 1 teabag chai tea/1 tablespoon looseleaf chai tea 
  • 1/2 cup icing sugar
  • 1/2 cup heavy whipped cream
Directions:
  • Simmer the cream with a bag of chai tea in it, or some looseleaf. Let it steep and cool. Strain and remove chai tea bits.
  • With a wooden spoon, stir together the mascarpone and sugar, adding a bit at a time (it's easy to overpower the mascarpone taste with too much sugar, I know because I did it and then I had to run out to the yuppy market down the way and buy another container of mascarpone which, though overpriced like all things convenient, I can assure you, did not go to waste).
  • Add the cooled, flavoured cream. Mix it all together.
  • Let it chill in the fridge to reconsolidate.
Now you just get the "cake" out of the pan, cut it in two and put a layer of compote in between. Dollop the icing on top and let it artfully fall whichever way it wants. Presto! CAKE!


The Lazy Mama's Lavender Ice-Cream

My Home-Made Honey-Lavender Ice-Cream.
If I can do it, you can too.

A few years ago my friend Nicole told me about an experience she'd had eating lavender whipped cream. "James and I took it to this dinner party, and it was delicious. But when we were biking home, it was like we were sooo stoned. But we weren't! It felt so weird. Then we came home and fell asleep, like totally passed out. We weren't even drunk."

I nodded, smiled, and filed this under two mental categories. The first was Soporific. The second, Ways in Which Nicole is Better Than Me.


You see, I am not a domestic goddess. I want to sew, but I don't have the patience. I like to eat food but if left to my own devices, I eat yogourt and cereal. I like laundry but my mending pile is so well-established, the clothes have actually come back in style.

But some mamas – those better-than-me mamas – they enjoy making stuff at home. They bake cookies with their kids. They source locally-grown, organic food and prepare it in delicious ways.  They don't consume processed crap and everyone in their family has a healthy relationship to bread. They are beautiful, healthy, strong, beautiful... Did I mention, beautiful? They glow, they cloth-diaper, they accomplish the impossible; their kids eschew candy.

What do I 'source'? I source no-name-brand marshmallow-chocolate cookies at 4am. I wear cosmetics with lead in them and I don't even care (very much). My baby knows where those processed cookies live and feels perfectly entitled to his fair share. I took anti-depressants and anti-histamines while I was pregnant. I'll never be one of those mamas. But I have, in my own way, recently come around to the creation of food.

Making food is awesome. It's like making art – except that, when done right, it doesn't stick around cluttering up your basement. Since I'm married to a fantastic cook, my domain is desserts. Which is kind of a good thing because if you're just getting into making food, it's encouraging when it's delicious. Enter, lavender. Lavender is the most awesome, bestest thing to ever come out of hipster domesticity, knitted bondage gear notwithstanding. It grows in abundance around our neighbourhood (Bernal Heights/Glen Park/Out Mission/Excelsior – yes, in SF you can live in four neighbourhoods), it's purple and in case you didn't know, it's the bush-form of French white linen drying in the sun.


This is the man who makes all my meals.
He's the man-form of French white linen drying in the sun.

Today we're making honey-lavender ice-cream. From scratch. I'm basing it off a Martha Stewart recipe so if you're the kind of person who's interested in doing things the right way, who does things like sifting flour and purchasing special cake tins, click here to follow the original domestic goddess recipe. For the rest of you lazy mamas, read on...


You will need:
  • 2 cups whole milk (2% tastes good too)
  • 1 cup heavy cream
  • 1/4 cup clean lavender buds (about 25 stems)
  • 1/3 cup honey
  • 5 eggs
  • **You can add some natural dye for extra goddess points, if you're feeling fancy. Look below for some suggestions.
Ingredients (cut out the sugar, the honey makes this dessert sweet enough)


Step 1: Making the milk taste like lavender.
  • Throw the lavender buds into the milk, put it in a pot on the stove and bring to a boil (leave a few stems out to use as a garnish).
  • Once it's reached a boil, remove the pot from heat and let steep for five minutes.
  • Strain out buds – don't throw them out, you can keep them for future deliciousness. You could even make lavender whipped cream with them.

Step 2: Whipping Eggs.
  • While the milk is steeping, blend the egg yolks on medium for 3-5 minutes. You can use a blender or elbow grease. It should be kind of thick. If you forget to keep the egg whites out, don't worry. This will just make the whole thing a bit more frothy. I know, because I did it.

Step 3: Add eggs to milk
  • Slowly add eggs to lavender milk, stirring to mix it in.
  • Stirring continuously, bring lavender milk/egg mixture to a low boil. It should thicken and become like a runny custard. 
  • Remove from heat.

Step 4: Add cream and chill
  • Pour the cream into a chilled bowl (preferably sitting in another bowl of ice-water).
  • When the lavender milk/egg mixture has cooled, mix it in with the cream.
  • Let it chill, then transfer to a freezer-appropriate container in the freezer. I used a yogourt container.

Step 5: Breaking up the ice-crystals
  • If you don't have an ice-cream maker and you're using the empty yougourt container method, it's a good idea to take a wooden spoon and stir the ice-cream every few hours so that it remains creamy (I had every intention of doing this, but I just fell asleep).
Serve with the lavender garnish. Done!


I'll leave you with a few other tips. In no particular order:
  • Colouring: I used the juice from some preserved pinot-noir beets to dye the ice-cream pictured above. You could also use a bit of red cabbage juice, regular beet juice, blackberry jam...

Lavender-esque colour.

  • Health Caveat: Like everything fun, lavender is not recommended for pregnant women and nursing mothers. No hard evidence as to the potential negative side effects, but you might not want to gorge on the ice-cream if you're preggers/nursing. To that effect, it would make a great weaning ritual gift...
  • Herbology: There are two popular strains of lavender. The left is English lavender, which is best for eating. The right is Spanish (commonly known as French) lavender, which is prettier. Your choice.
English lavender, left. French/Spanish lavender, right.

  • Harvesting: The rule if you're stealing lavender from your neighbours is not to take more than 3 off any one bush, and to take only stems that wouldn't be noticed. Stay away from plants on the roadside or beside driveways. Even a few feet from the street greatly reduces the toxins you'll be ingesting. When you get home, wash all the stems in water and then remove the buds by sliding your fingers down the stalk.
Wash the lavender, remove the buds.

Enjoy!